The look of mylar packaging is increased by printing, enhance the value of the pouch instantly. In this article, you will learn how to make custom printed mylar bags with a detailed guide to make the print of the pouches stand out. This blog will take you through everything you need to know. Don’t miss the chance to improve the impact of these bags. Scroll down and ready to make the amazing artwork of your bag!

Step 1: Find The Right Bag Size and Style
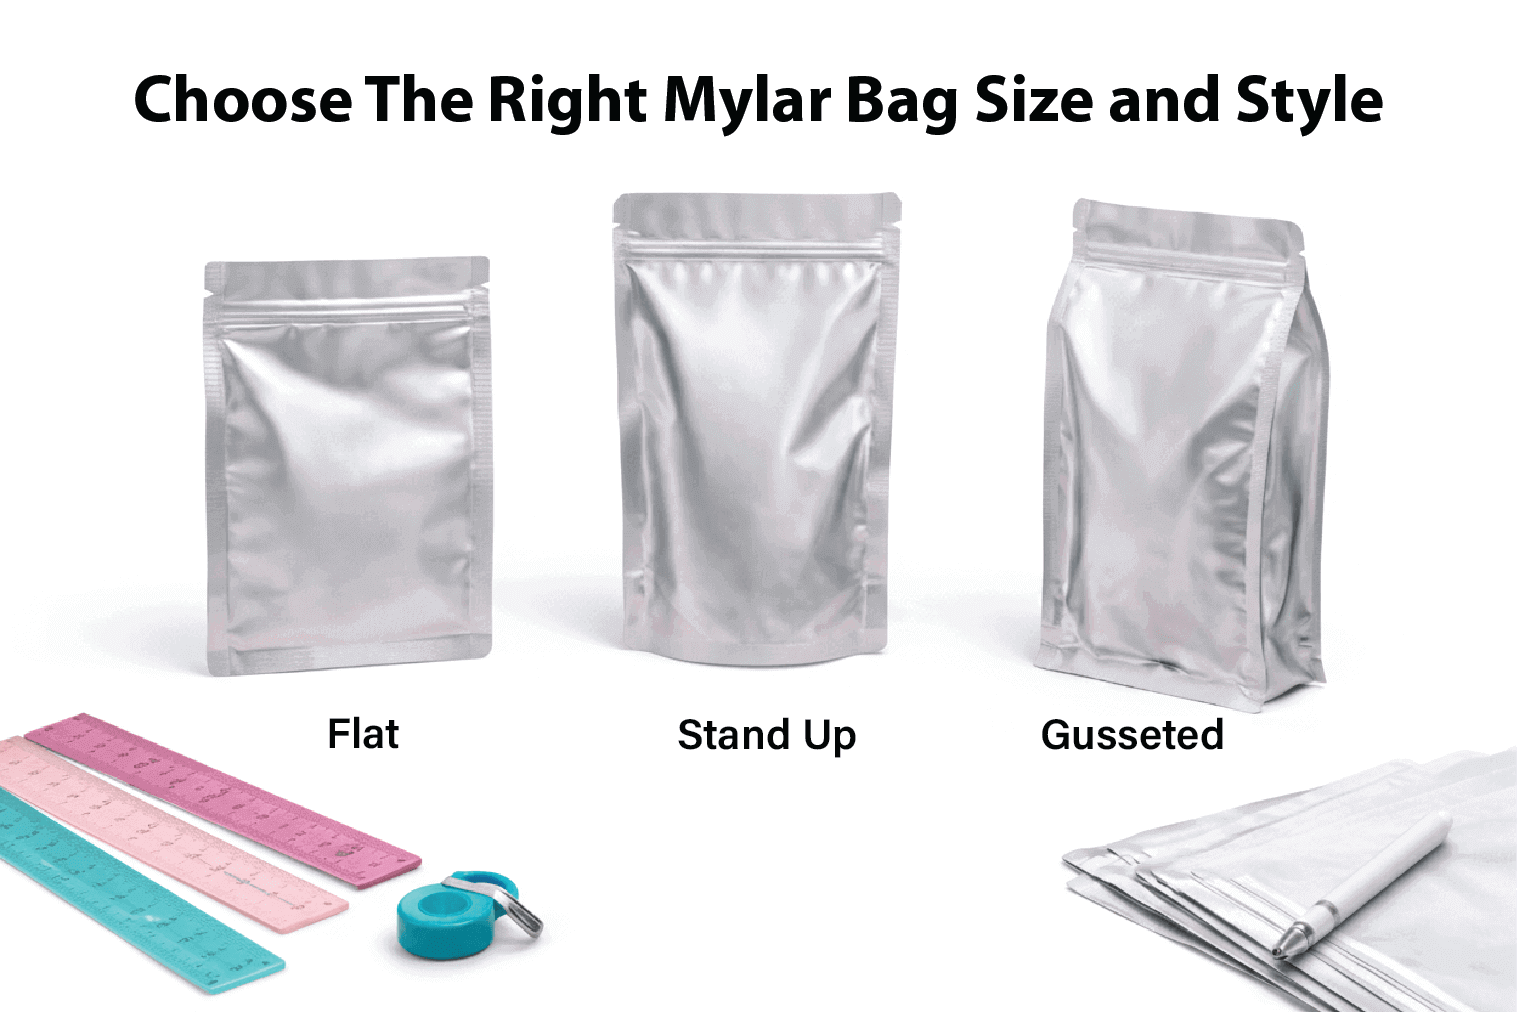
Alright, before you move to design or printing, the first step is choosing the right size and style of your bag. This is important because your pouch should not only look good but also fit your product properly. When selecting the size, always consider your product dimensions so the bag is not too tight or too loose. Also, think about how the product will be stored or displayed on shelves. Choosing the right size and style at the beginning makes the whole packaging process easier and gives your pouch a more professional look.
Step 2: Create Bold Artwork For Your Mylar Bags
The first step in creating custom printed bags is designing the artwork. Whether you want to print your logo and custom graphics, the design is important to make the pouch attractive.
Consider the Bag Size:
Make sure your design fits the size options of the bag by using the packaging customization tools. You don’t want important text or logo cut off! Create a mockup of your design on the bag to visualize how it will look.
Use Strong Branding Packaging:
Follow your branding colors, a logo, establishing the recognition of your brand and creates a cohesive look for your product. Like, Holographic Mylar Bags can further enhance your design by adding a premium, eye-catching effect that makes your packaging stand out.
Keep Your Design Impactful:
A simple design by using waterproof packaging for your printed logo and a few words can be more attractive than an complex design. Moreover, you can add a feature like Custom Spout Pouch used for easy pouring of liquid, and they are duable in many unique shapes to make an amazing design. Furthermore, there are also a resealable feature making an impactful impression on buyers in Child Proof Bags.
Step 3: Prepare The Design Ready For Printing
Once you’ve finalized your artwork and selected the right bag size, it’s time to get your design ready for custom printing. This blog will teach you how to make custom printed mylar bags that stand out on the shelf. Let’s discover the newest packaging design trends in Custom Printed Mylar Bags, including holographic effects and luxury matte coatings.

Printing Specifications to Keep in Mind:
When preparing your design for printing on Mylar bags, there are a few important printing specifications to keep in mind. First, designing has a high resolution of at least 300 DPI to guarantee that the print will be clear and professional-looking. Next, use the CMYK color format (cyan, magenta, yellow, and key/black), as this color mode is typically used for printing on Mylar bags for accurate color reproduction. Lastly, include a small margin around your design, so that no part of your artwork is cut off when the bag is printed.
Step 4: Best Printing Method For Print The Design On Mylar Film
Now, you’ll need to decide how to print your design onto the Mylar bags. There are several printing methods to choose from, and each one has its pros and cons. Learn how to make custom printed mylar bags for your products, with insights on customizable packaging materials, design, and custom printing techniques. Here’s a quick breakdown:

-
Digital Printing
Printing is an excellent option for full-color, high-quality designs with detailed images. This method uses inkjet technology to print directly onto the mylar sheets. It’s a versatile and efficient method for custom designs and works well for both small and large batches. Digital printing clears the designing and makes it ideal for multi-colored artwork for vibrant colors.
-
Gravure Printing
This printing is a traditional method used for high-volume printing jobs. It involves engraving your design onto a cylinder, that is then used to transfer the ink onto the Mylar sheets. This technique is known for its ability to produce consistent, high-quality prints and is best suited for large. Moreover, gravure printing is perfect for fine details and shading, making it ideal for larger packaging projects where consistent quality is essential.


-
UV Printing
It uses ultraviolet light to dry the ink as it’s printed. This method is known for its ability to create vibrant, durable prints on Mylar bags. Excellent color accuracy and the ability to print on a variety of materials for exceptional color saturation. Moreover, UV printing is also ideal for small businesses and designs requiring high-end finishes.
Which Printing Method Is Best for You?
If you’re printing a highly detailed design, digital printing is a great choice as Flexible Pouch Manufacturers prefer this method for precision. For larger batches, flexographic printing or screen printing might be more cost-effective.
“My motto is strong packaging, clear addressing.” — Halldór Laxness
Step 5: Laminate The Printed Layers
After printing on the Mylar film, the next step is lamination. In this stage, the printed film is combined with one or more extra layers using adhesive as well as heat to create the full pouch structure. Lamination is important because one printed layer alone is usually not strong enough for packaging. The added layers make the pouch stronger, more durable, and better for storing different products. By using FDA-approved packaging and food-safe Mylar bags, their lamination block moisture. Furthermore, opt for biodegradable packaging and UV-resistant packaging to support sustainability while preserving your items from lightweight packaging solutions damage.
Step 6: Cut The Film Into Bag Panels
After lamination, the designer cut the material into the correct sizes and shapes for pouch production. This step is important because accurate cutting ensures each bag looks neat, the print is properly aligned, and sealing works correctly. Laminated film is measured carefully and cut into panels for the front, back, bottom, or sides of the pouch. These panels are then prepared for different pouch styles, each with its own purpose and shape. Like, Extra side and bottom space are in Gusset Mylar Bags, so they can hold more product easily.
Their cutting pattern must be precise to create a strong shape and allow the bag to stand or open properly. Moreover, Custom Stand Up Pouch Packaging is cut to match specific brand sizes, giving businesses more flexibility in shape and presentation while keeping the pouch standing on display. Furthermore, Black Kraft Stand Up Pouches combine a natural kraft look with a bold black finish for a more premium appearance. They are often used when businesses want packaging that are durable.
Step 7: Form And Seal The Bags
After cutting, the printed film moves to the forming stage. Here, the flat material is shaped into a pouch.
Sealing the Sides and Bottom
The sides and bottom of the pouch are then sealed to make it a proper shape. Heat sealing is commonly used for this step because it creates a firm closure. Strong seals are important to keep the product safe inside the bag.
Final Shape of the Bag
If the pouch is a stand-up bag, the bottom gusset is also formed during this stage so the pouch can stand properly on shelves. Once the forming and sealing are complete, the bag takes its final shape and is nearly ready for filling or final checking.
Step 8: Check The Final Pouch Like A Pro
After your Mylar bags are printed and sealed, it’s time to check them and then mylar bags are ready. This step finalizes everything to look perfect before the Flexible Retort Pouch Packaging Supplying. Check the printed design for color accuracy, text and images are in clear format. Examine the durability of bags to confirm that they can withstand handling and shipping without damage. You can discover the secrets of how to make custom printed mylar bags that combine style, as well as durability. Contact experts today to make custom printed mylar bags that meet your exact requirements.
Pro Tips For Getting Better Results
Tips for making the pouches better, you have to keep these things in view:

| Tips | Description |
| Use High-Quality Designs | Your artwork is in high-resolution and visually appealing to attract buyers. |
| Choose The Right Size | Select the appropriate size of bag based on the requirements of your product. |
| Test The Print Proof | Always approve a print before sustainable production methods to avoid errors and ensure quality. |
| Make the pouches Sustainable | Select the right thickness of Eco Friendly Pouches Wholesale to make protective packaging of environmental factors. |
“Recycling, packaging, businesses are changing all of those things because that’s what consumers want.” — Jerry Greenfield
If you already know about custom printed versions, you must be wondering how the plain shape is before printing, right? So, before printing let’s see the whole detail about How To Make Custom Mylar Bags to uncover the core manufacturing steps!
Conclusion
Making custom printed bags is a simple way to increase the presentation of products. From artwork and size to printing method, each step makes packaging that stands out. Whether you need packaging for food, retail, or small business use, this process gives you a clear starting point. Printing turns basic materials into premium packaging, much like Cheap Custom Packaging Companies that focus on branding. Start designing by getting the full guide on how to make custom printed mylar bags and make them extraordinary.
Frequently Asked Questions (FAQs)
Digital printing is considered the best for small orders, while gravure printing is best for large orders. UV printing makes the pouches vibrant and drying fast.
Measure the dimensions of your product and leave extra space for sealing. Choose a size that comfortably fits your product while providing protection and a professional look.
Yes, they are food-safe and comply with FDA standards for direct food contact. They are using food-grade materials to make the packaging safe.
Production time typically ranges withn a week, depending on order and design complexity. Design approval may take additional time before production begins.
Some custom Mylar bags are biodegradable and made from recyclable materials, but traditional Mylar bags are not fully eco-friendly.